
HOW TO USE BOKEH OVERLAYS + FREE OVERLAY
In this tutorial I’m going to show you how to add a bokeh overlay to an image in Photoshop
Elements Needed:
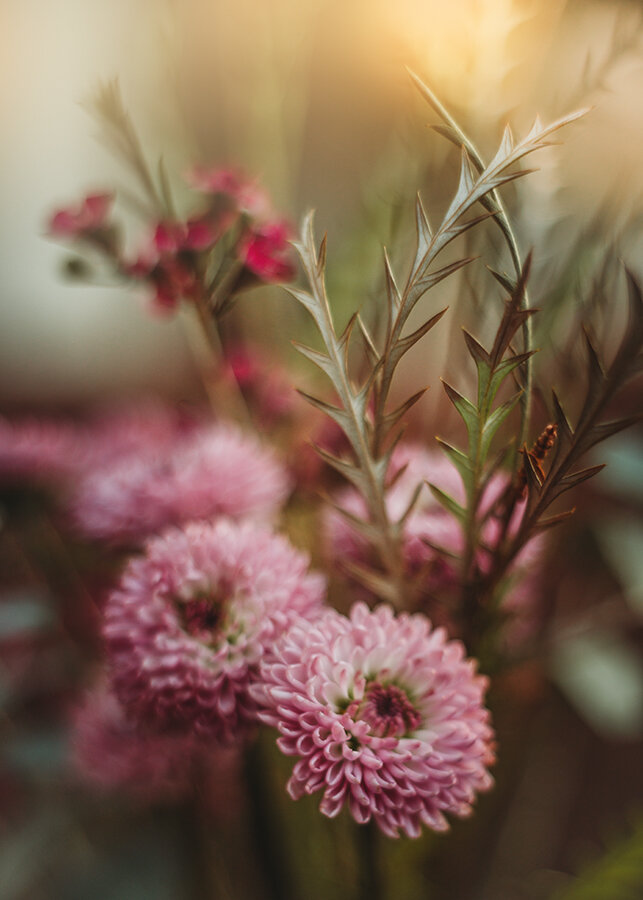
An image where you want to add the bokeh
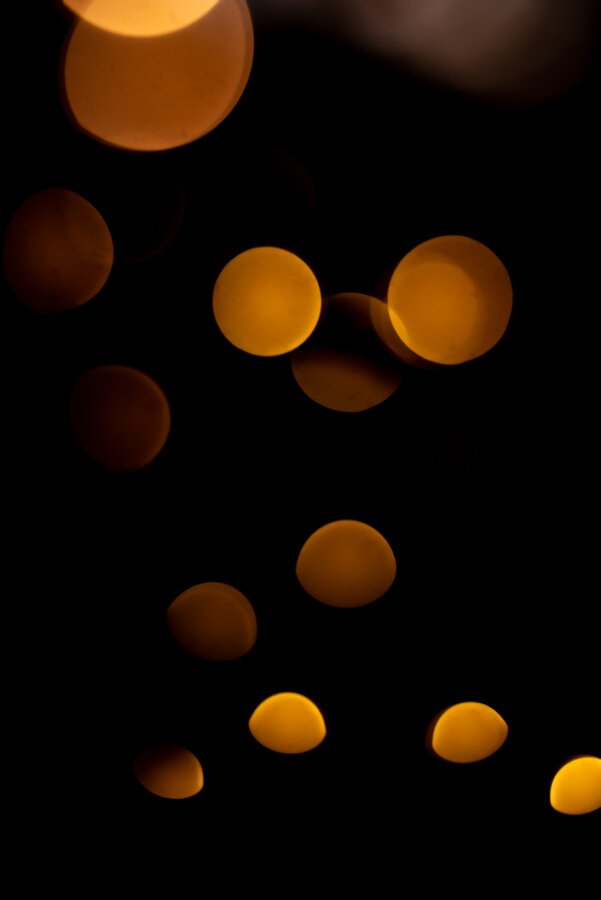
2. A bokeh overlay

STEP ONE
Open both images in Photoshop
With the move tool, grab the overlay and slide it towards your image tab, once it opens release it on top of the image
This will create a separate layer for the overlay image
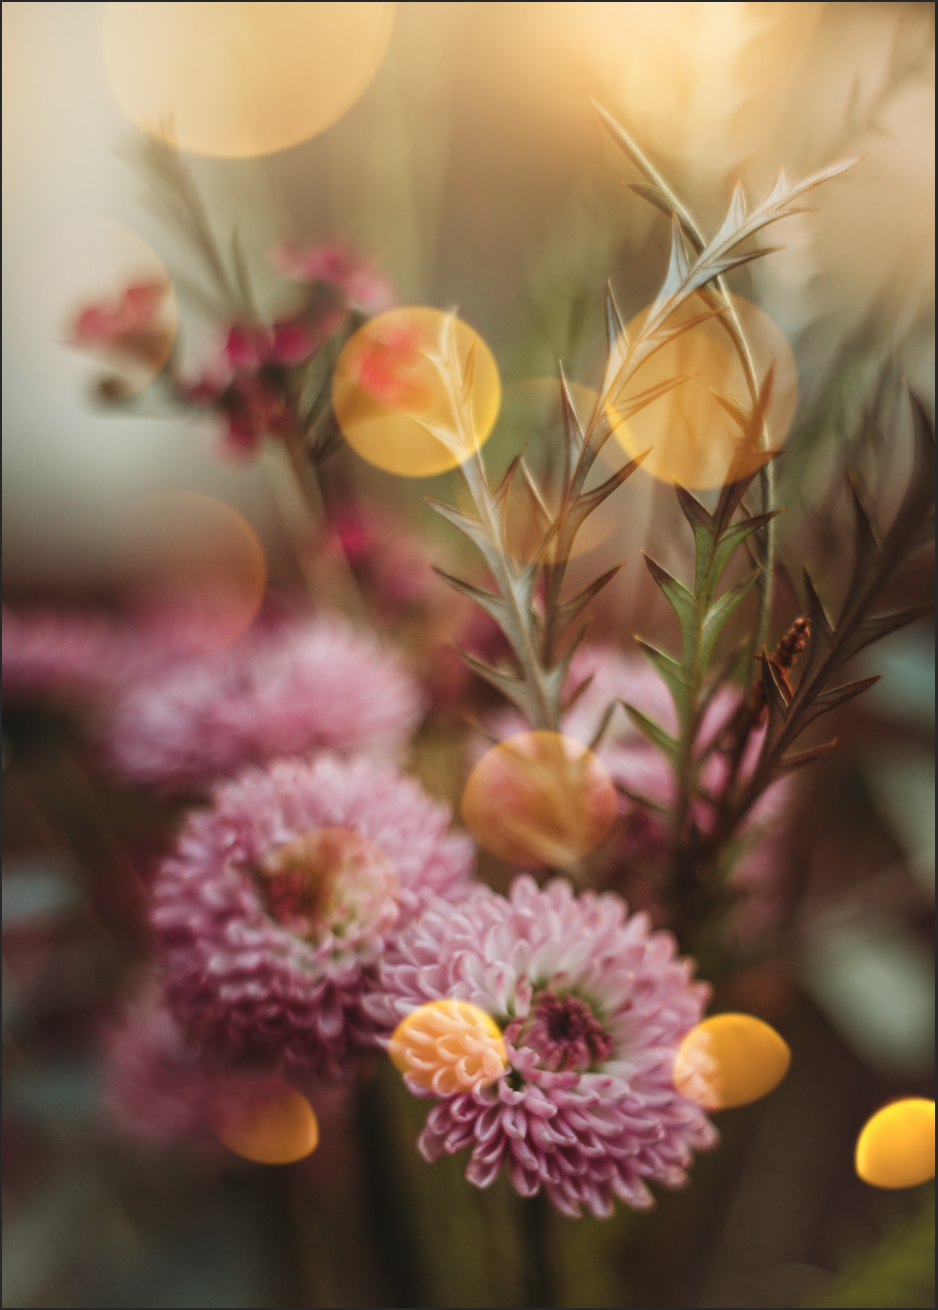
Change the blending mode of the overlay layer to “Screen”

STEP TWO
Move the overlay around until you find where it looks better on the image
Reduce the opacity to taste, in this case I reduced it to 55%

STEP THREE
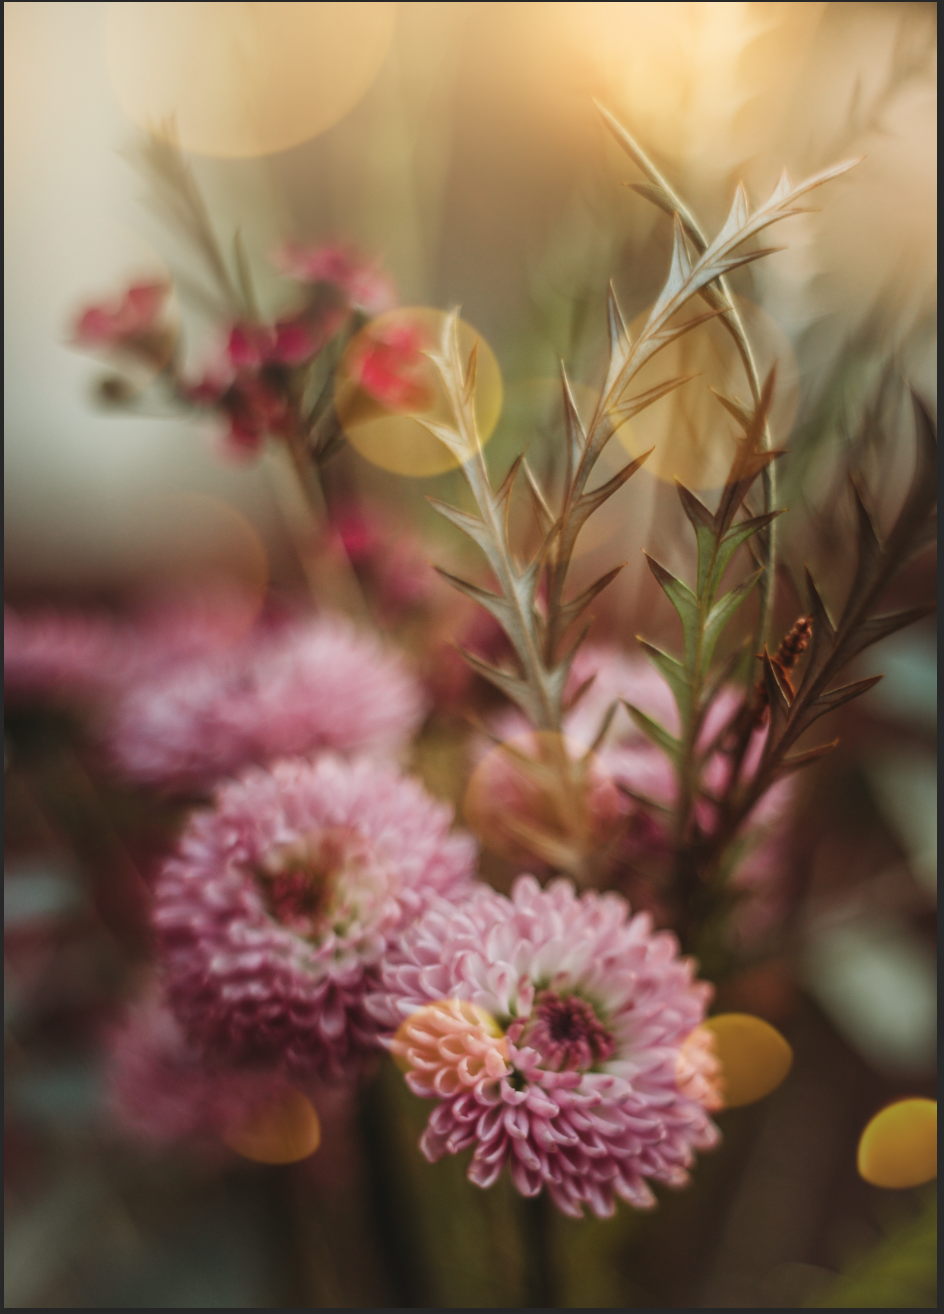
Add a layer mask to the Overlay layer
With a soft black brush paint over the areas of the overlay where you wish to remove it.

OPTIONAL STEP
If you want to add more bokeh, duplicate the overlay layer and move it around to cover more of the picture. To duplicate the laye right click on it and select “duplicate” from the drop down menu.
Delete the layer mask by right clicking over it and selecting “delete layer mask”
Add a new layer mask and repeat step three.
Please let me know if you have any questions!
