PHOTOSHOP’S GENERATIVE FILL” MADE EASY
If you're like me and this whole AI stuff sounds like something scary and confusing, here’s a very basic tutorial on how I’ve been using this new tool called generative fill in Photoshop.
Generative fill might sound complex, but it’s actually quite simple once you get the hang of it. Essentially, it’s a feature in Photoshop that uses artificial intelligence to intelligently fill in areas of your image based on surrounding content. Think of it as a smart, automated way to fill in gaps or extend backgrounds seamlessly.
So, let’s dive into how you can start using generative fill in your own projects:
STEP 1: Open Your Image in Photoshop
First things first, open up the image you want to work with in Photoshop.
STEP 2: Select the Area You Want to Fill
Use the LASSO tool (shortcut: press "L" on your keyboard) to outline the area you want to fill. This could be a blank space, a sky that needs more detail, or any other area you want to enhance.
STEP 3: Access the Generative Fill Tool
With your desired area selected, go to the Edit menu at the top of the screen and select "Generative Fill". This tells Photoshop to use its AI capabilities to fill in the selected area.
STEP 4: No prompt
Leave the prompt area empty and select “Generate”. Photoshop will analyze the surrounding content and intelligently fill in the selected area, creating a seamless blend with the rest of your image.
STEP 5: Select the best result
Photoshop will generate three different variations on a separate layer. Select the one that best works for your vision, or click on “Generate” again to get three more variations and so on.
And there you have it – a basic introduction to using generative fill in Photoshop! While it may seem like magic, it’s actually just the power of AI making your editing process easier and more efficient. So don’t be afraid to give it a try in your own projects – you might be surprised at the results you can achieve.
Using a Prompt with Generative Fill
One of the most fascinating aspects of generative fill in Photoshop is its ability to understand and interpret prompts to guide its creative output. By providing a prompt, you can influence the direction of the AI's generation, allowing for even more control over the final result.
Here’s how you can use a prompt with generative fill:
STEP 1: Craft Your Prompt
Before applying generative fill, think about the desired outcome for the filled area. Are you looking for a specific texture, pattern, or style? Craft a concise prompt that describes your vision. For example, if you’re filling in a cloudy sky, your prompt could be “soft, fluffy clouds with hints of sunset hues”.
STEP 2: Access the Generative Fill Tool
Follow the same steps outlined earlier to access the generative fill tool on the selected area you want to fill.
STEP 3: Enter Your Prompt
In the Prompt dialog box, you’ll notice a text field labeled “What would you like to generate?”. This is where you’ll enter your prompt to guide the AI’s generation. Simply type in your prompt and ensure it accurately conveys your desired outcome.
If this doesn’t result in what you where looking for, try again with a different prompt, you don’t have to start over, just use the same prompt field.
STEP 4: Fine-Tune the Outcome
After applying the generative fill with your prompt, take a closer look at the result. If it’s not quite what you had in mind, don’t worry – you can fine-tune the outcome. Use adjustment tools such as blending modes, opacity adjustments, manual touch-ups or masking off any unwanted area, to refine the filled area further. This step allows you to add your artistic touch and ensure the final result aligns perfectly with your vision.
Have fun! Prompts offer a fun and powerful way to guide the AI's creativity toward your desired outcome, ensuring that your final result reflects your unique vision.
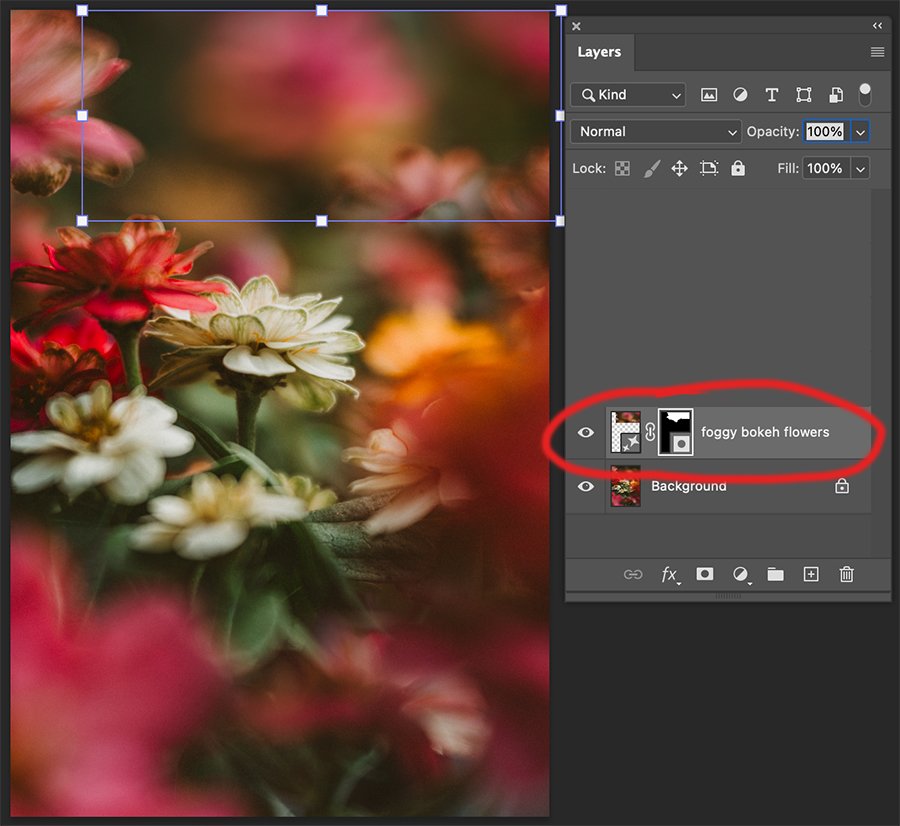
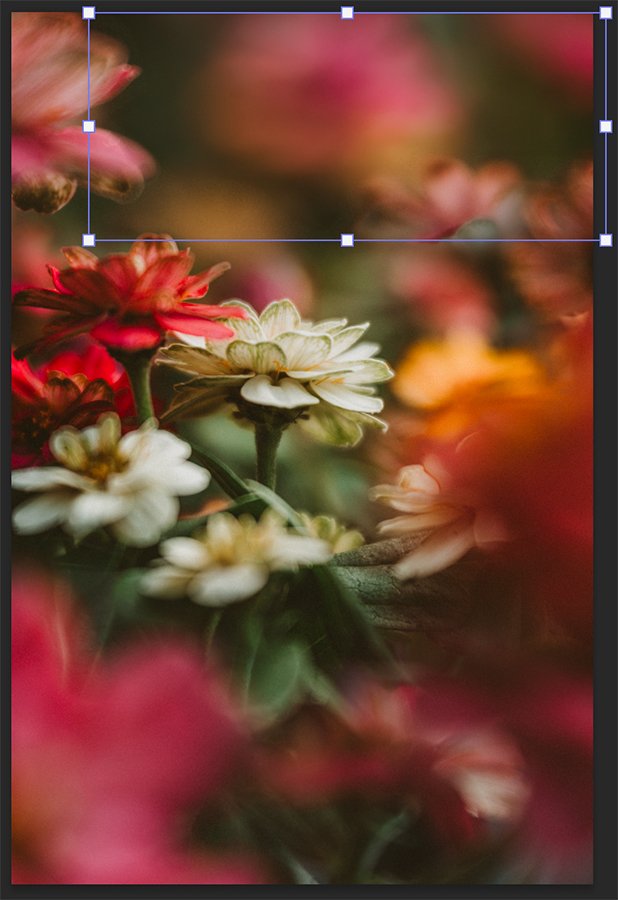
Example below:
I selected the area that I wanted to fill with the lasso tool.
I used the prompt: “foggy bokeh flowers”.
I find-tuned the layer by masking off the unwanted areas to achieve the result that I was looking for.