
CREATING AND CAPTURING RAIN IN YOUR FLOWER PHOTOGRAPHY
In this mini tutorial I'm going to share with you how I create my "rain" pictures with some behind the scenes images and the little trick I use.
I hope it helps, let me know if you have any questions.

YOU WILL NEED:
• Spray bottle
• Your subject
• GOOD Light
• Macro lens, lensbaby or freelensing

MY SUBJECT
This is a pullback of the subject I'm going to photograph, as you can see it’s just a simple bush. See how the light is coming from behind the trees in the back. The sun is right behind those trees.

COMPOSE YOUR SHOT
Moving in closer with my macro lens. Look how the light in the back becomes this beautiful bokeh. Compose your shot before "adding"'the rain in the next step..

THE CAMERA TIMER
You're going to use the timer on your camera to be able to capture the water droplets.
Set the timer to capture several shots, mine is set to 9 with 1 second interval between shots.
Hold the camera in position and press the shutter. Start "spraying" as soon as the fist shot fires, keep spraying throughout the shots making sure not to lose focus of your main subject.
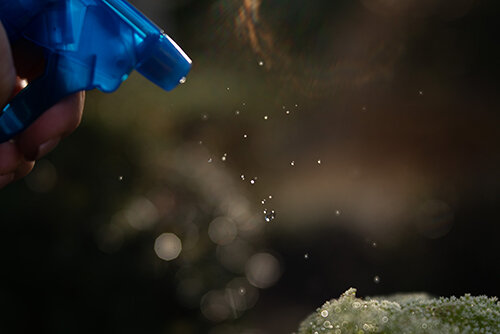
LIGHT
Make sure there's good light hitting the water droplets and that you can clearly see them through the view finder.

FINAL IMAGE
Edit your image to your own stile and see how the water droplets shine through the frame!

That’s it!
I hope this was useful, now go have some fun and please share your creations with me!